What is LVC-Audio ClipShifter 2?
ClipShifter 2 is a wave-shaping clipping-style limiter that combines multiple audio processing functions. These are: Hard brickwall limiting, Soft saturation, and Compression. This handy, affordable plugin gives producers control over the sonic character of clipping distortion, making it useful across various mixing stages. In this deep-dive LVC-Audio ClipShifter 2 review, we’ll take a look at what makes it so indispensable for modern music production.
Tired of juggling separate plugins for limiting, saturation, and compression – and still fighting harsh, lifeless mixes? ClipShifter 2 brings it all together in one smart, musical processor. Here’s why:
- Clip Shape Control: Adjustable from hard clipping to subtle compression with minimal distortion
- Harmonic Control: Independent even- and odd-order harmonic shaping
- Dynamic Threshold: Can be set to rise or fall with signal level, allowing it to respond to transients
- Independent Left/Right (or Mid/Side) threshold controls for greater flexibility
- Frequency Targeting: Frequency-specific clipping and pre/post-EQ controls
- Hard brickwall limiting: Keep absolute control over your peaks without unwanted distortion or overshoot. Perfect for mastering, drums, and aggressive genres where level is everything.
- Soft saturation: Add warmth, character, and subtle harmonic richness that makes tracks feel bigger, not louder-for-the-sake-of-louder. Push it gently for analog-style glue or drive it harder for modern edge.
- Compression-style control: Shape dynamics with precision. Tighten transients, smooth vocals, tame unruly bass, or add punch and presence to any source.
Introduction:
LVC-Audio recently entered the plug-in swarm of limiters, transient shapers, saturators, and distortion devices with ClipShifter 2. It’s a keen little handy-dandy “Go Go Gadget Clipper.” When developer, Matt Witimer, first chatted with me about it, I honestly wasn’t quite sure what a “ClipShifter” did.
To nutshell it for you, this tidy, cross-platform plug-in wave-shapes audio and functions like a clipping-style limiter. Users can vary the sonic characteristics of its clipping and distortion from hard, brickwall-style clipping to soft, compressed saturation.
Draw in a deep breath. The faint-of-heart should not even consider the cost of this clip-shifting goodness. Only the most ardent, full-time professional recording engineer would seriously contemplate applying for a second mortgage to equip their studio with this exorbitantly priced digital weapon. Are you seated and prepared? ClipShifter costs an overwhelming $1176 (USD)!

Ha Ha – Jus’ Kidding. In truth, this nifty pluggie only costs, $11.76
That’s right – Eleven dollars and seventy six cents (USD).
Taking a more serious look:
If you’re looking for clean, breathy, transparent limiting, then you will need to consider a different plug-in. In the value-conscious price range, I would strongly recommend the incredible “ToonBooster TB Barricade”. However, if you want a cool character clipping /Limiter, then ClipShifter is most definitely one of the best to have come along since sliced bread.
In brief, ClipShifter makes use of not one, but two, limiting stages. These are named: “Initial Threshold” and “End Threshold”.
ClipShifter begins its tour-of-duty as a basic clipper plug-in. It performs its sentry duties by clipping every part of the passing signal, whenever the signal input exceeds the current threshold setting. ClipShifter programmatically accomplishes its task based on a principle very similar to the typical diode clipping you find in many guitar stomp-box pedals.
By leaving the “Harmonics Control” and “Clip Shape” parameters at their default settings of 1.0, and ensuring that the “Link” button remains engaged, ClipShifter functions in this diode-like manner.
To Clip or not be Clipped – that is the question:
When the Link button is disengaged, the plugin presents the user with separate “Initial Threshold” and “End Threshold” controls, along with Attack and Release. For example, set the Initial Threshold to -6 dB and the End Threshold to -1 dB. At these settings, the plugin clips any audio passing through it that exceeds -6 dB (nothing new).
Hi, you! If you like these kinds of reviews,
be sure to subscribe.
What ‘is’ new, is that the threshold will now gradually start ‘edging’ toward the “End Threshold” of -1dB. Successive loud signals that feed into the plugin also become clipped; however, clipping may now occur at -5.9 dB. This gradual gain reduction continues until clipping ends at the “Ending Threshold” of -1dB.
Installation & Setup:
You can download ClipShifter in a standard ZIP file. Upon download completion, you simply extract the tiny *.dll and manually copy it into your VST folder.
The plug-in is accessible immediately, albeit in a feature-limited capacity. Once you purchase the plug-in, LVC-Audio electronically sends you a registration file — usually within 12 hours. You then save this text-based registration file into the directory where the plug-in resides. In short, the next time you launch ClipShifter, it automatically registers and activates with full functionality.
The full, unrestricted features of the registered version are:
- oversampling with double processing
- Multiband frequency controls
- Mid/side processing.
These controls enhance ClipShifter’s versatility big time. Specifically, they make ClipShifter more desirable for final audio processing and/or more strategic saturation effects. :THUMBS UP:
Visuals and Interface:
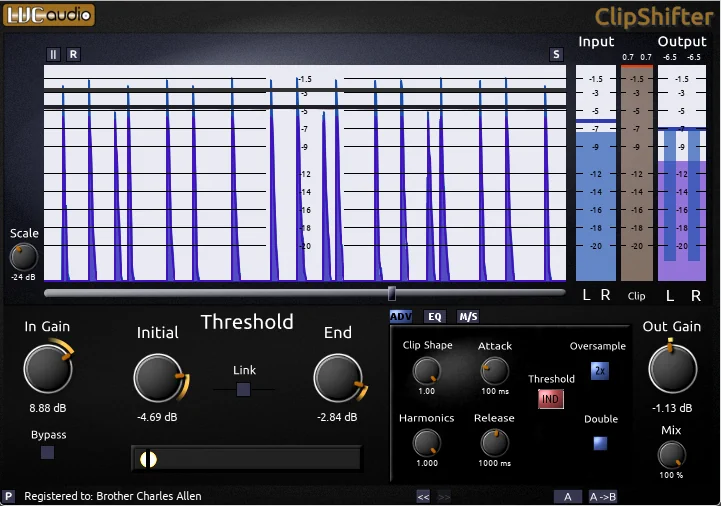
“Clippie” (my nickname for ClipShifter) is just like Momma Bear’s bunk; it’s just right. Not too big, not too small. With a screen dimension of 720px wide by 500px high, the GUI displays clearly on almost any monitor.
The GUI is attractive without being the least bit ‘wimpy’ looking.
ClipShifter’s medium-grey background allows the comfortably-sized knobs to show up smartly. Each GUI element appears well-proportioned, tastefully styled, and clearly contrasted. The clean, “sans serif” typeface is legible. On the whole, “Clippie” exhibits familiar, intuitive naming conventions too.
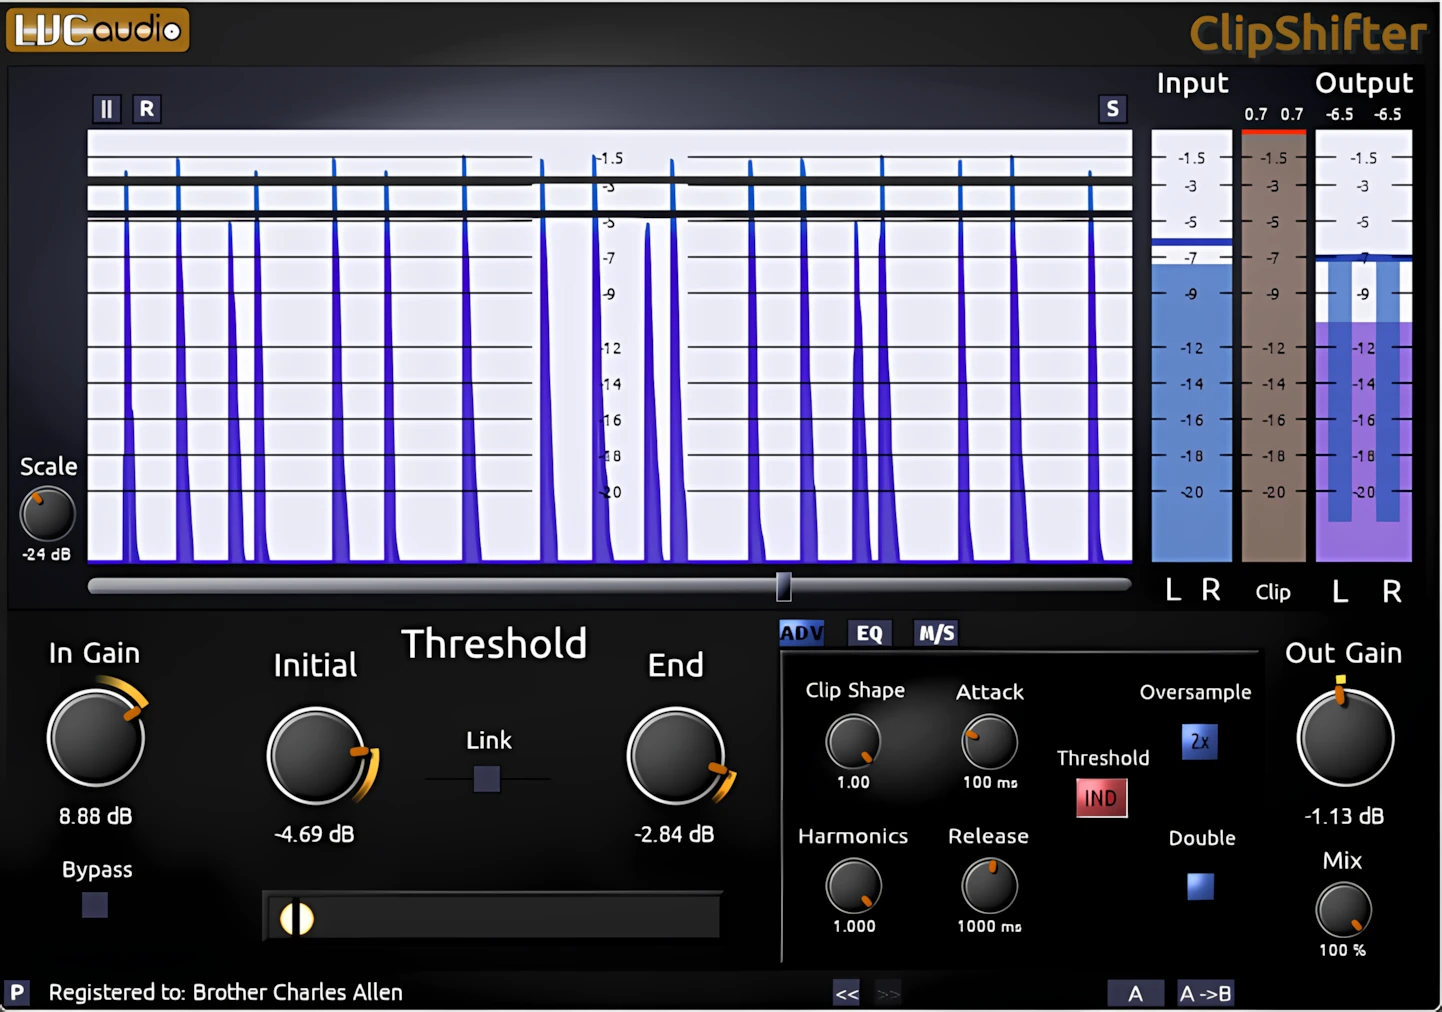
The upper portion of the plug-in shows off a good-looking analysis screen named the “Waveform History” window. This window displays information about peak input, peak output, dynamic-clipping threshold, and clipping reduction.
The meters display output levels in a rich, violet-blue color, while they show input levels in a lighter indigo-blue tone. Of course, a solid black line clearly indicates the dynamic clipping threshold.
In the upper right corner, above the “Waveform History” window, a small square button marked with an “R” serves as the Reset button. When you click it, you clear the current waveform display.
You can also temporarily pause the waveform history view to inspect the audio signal by pressing the “II” (Pause) button. This pause affects only the display and does NOT change the audio. Additionally, you can still adjust the vertical volume slider while the waveform history view remains paused.
Exploring Waveform History:
Firstly, along the left side and bottom of the Waveform History window, you’ll see sets of sliders. By default, the waveform history displays 10 seconds of audio and shows the full volume range (from infinity to 0 dBFS). You can use the horizontal and vertical sliders to zoom and adjust these display settings.
Secondly, in the upper right-hand corner of the Waveform History window, you’ll find a settings button marked “S”. Clicking this button opens an additional dialog box where you can fine-tune the meters and waveform history view. Finally, use the color knobs to adjust and customize the hue of the display to your preference.
Changing any of the colors will also alter the colors within the VU meters. Both the Input and Output colors are semi-transparent, so the colors will interact with one another. In summary, the user can adjust the smoothness and decay time of the VU meters in this options dialog box.
Metering Matters:
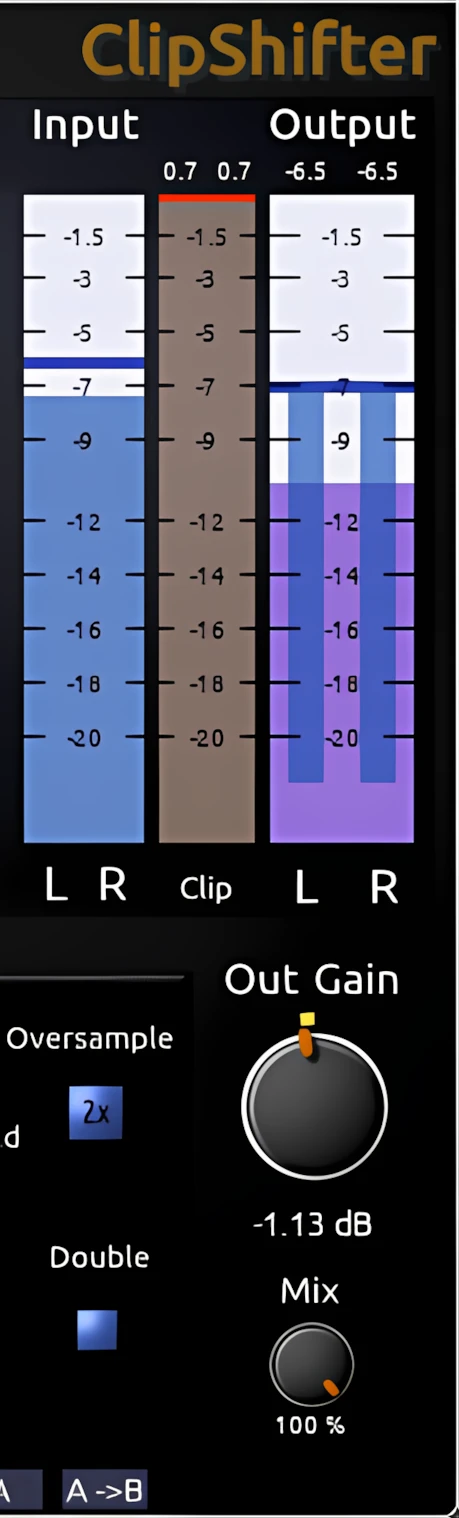
Along the right side, observe a pair of easily-read, real-time audio meters. These meters dynamically display real-time information about input, output, clipping amounts, and clipping threshold values.
The input meters show the signal level AFTER it passes through the Input Gain stage. The solid bar behaves much like a traditional VU meter, featuring a fast rise (0.1 ms integration time), and a slower decay of 300 ms for a 20 dB drop. Contrarily, the dashed meter behaves more like a Peak Program Meter (PPM), with a slower rise and fall—about 3 ms integration time and roughly 5 seconds to fall by 20 dB.
Finally, the system calibrates all meters to 0 dBFS, so any signal that maxes them out indicates digital clipping.
“C’mon, show us yer bottom then, Love”
The bottom half of ClipShifter’s interface houses the various parameter-control knobs. This is where you twist, turn, and occasionally panic-adjust your way to better sound. Each knob feels like it’s daring you to see how far you can push it before things start to sound “creative” instead of “good.”
You’ve got all your usual suspects down there—thresholds, ratios, attack, release—lined up like they’re about to be interrogated in a crime drama. Want subtle, transparent control? Gently nudge a few knobs. Want your drums to sound like they’re kicking down a door? Crank them like you’re late for soundcheck.
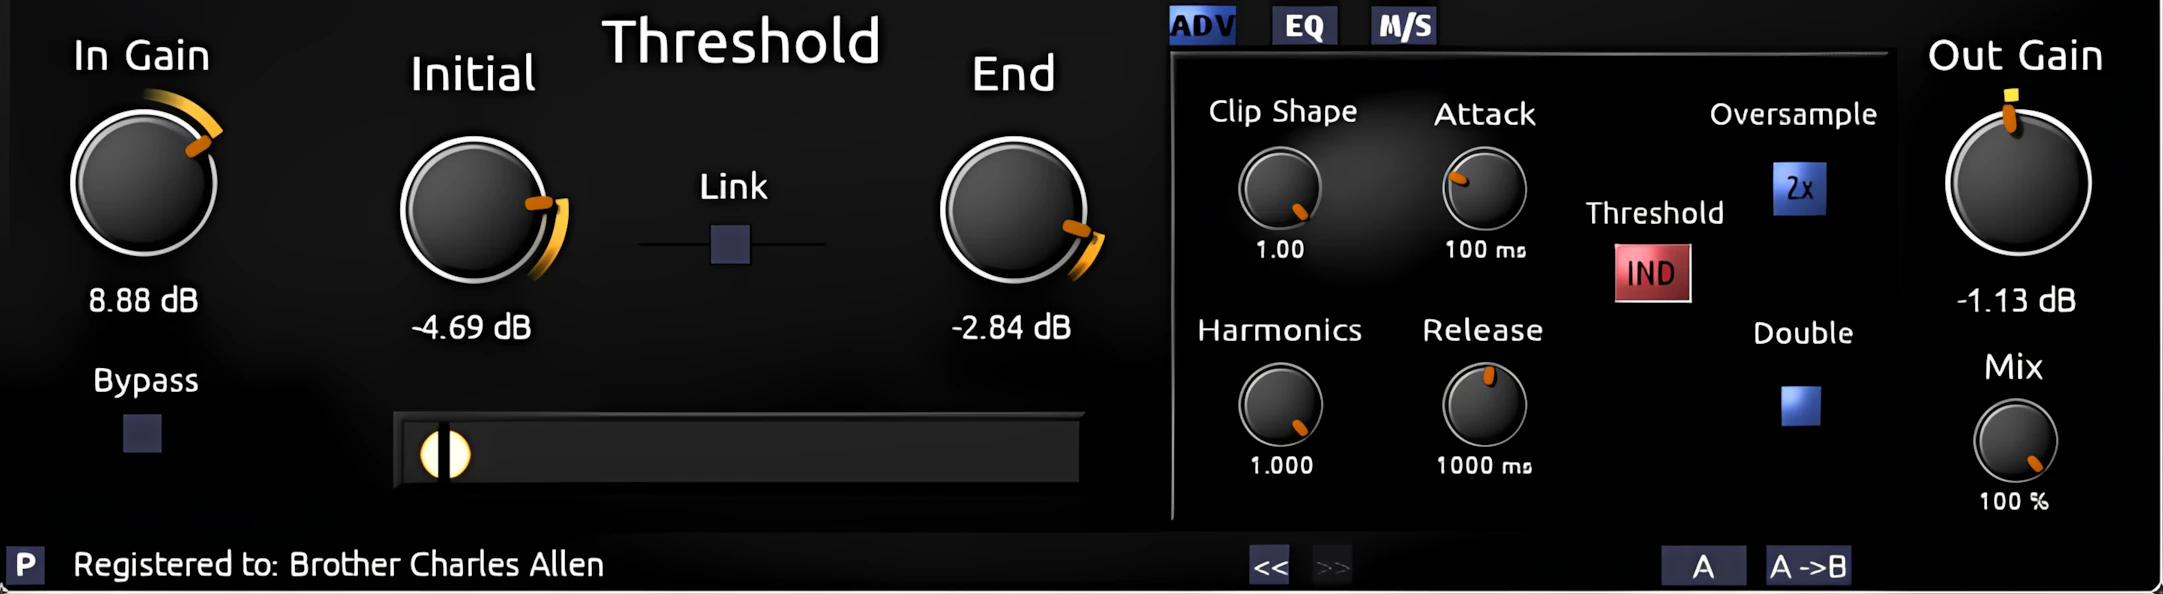
In short, the bottom half is where the magic, chaos, and “oops, that actually sounds amazing” moments happen. You will also see “Oversample” and “Double” buttons in the full (purchased) version.
Presets Management:
ClipShifter can save and load presets using the standard fxp/fxb format, with 20 slots available for user presets. Saving and loading these presets is normally handled by your audio host. For extra flexibility (and for when your DAW forgets how to behave like a human), ClipShifter can also export and import presets using its own built-in preset import/export function.
Exporting presets creates a simple text file that you can load again later, like a time capsule. Firstly, set all the controls and buttons exactly how you want them. Secondly, click the “Preset” button in the lower-left corner of the plugin—the tiny button marked “P” hiding in the very bottom left like it owes you money. Finally, the plugin will create a file named, “preset.txt”, in its own folder.
CAUTION: Each time you export a preset, it is saved with the default name, “preset.txt”. Any previously saved preset with that name will be overwritten.
This feature is a very useful and convenient start, but it would greatly benefit from further development. I strongly encourage Mr. Witmer to expand the preset system so that it appends new presets rather than overwriting them each time.
Enough with the GUI talk, already!
Sheesh! Give a guy a typewriter and a web site, and he won’t shut up . . . ha ha.
Seriously though – ClipShifter’s array of knobs, sliders and buttons all respond very smoothly to mouse movements. Double-clicking on any knob or slider resets the control to its default value. Each parameter accepts manual keyboard input for assigning values. These are nifty features — ones that I encourage all developers to incorporate into their plug-in interfaces.
Overall, this interface is functional, eye-pleasing and sensible-looking. The design gives the clear impression that intelligent, well-thought-out flow-charting was used as a reference, resulting in a logical and efficient GUI layout.
Sound Quality:
This plug-in is very emphatically a “clipping/distortion/limiting” apparatus. This is not a clean, transparent brickwall limiter in the vein of TB Barricade, IK Brickwall, or Slate FG-X.
LVC-Audio makes no claims, or even hints toward, this neatly packaged block of code intending to emulate any revered, time-honored analog hardware. Because of that, when you push this plug-in, the effect is bold, unapologetic, and unmistakably modern.
With some care, you can coax “Clippie” into delivering a more genteel, transformer-style saturation that resembles classic analog compression. Still, its digital soul is closer to an Ibanez TS9 overdrive pedal than a UREI 1176 rack-mounted compressor.
ClipShifter does not suffer from harsh, sterile digital artifacting. On the contrary, it exudes sonic warmth, and is capable of producing musical, harmonically-pleasing saturation. Backing off the “Clip Shape” knob will yield a softer saturation. Ultimately, you could loosely compare this behavior to a “soft-knee” function, where the signal transitions into processing more gradually and less abruptly.
I recently recorded an electronic music piece entitled, “Three and a Half Years”. The Prophet-style lead synth has “Clippie” applied on its signal chain.
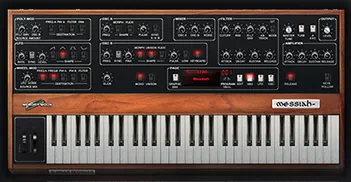
Three and a Half Years
This track showcases MemoryMoon’s Messiah running through ClipShifter 2, letting you really hear how the synth responds when its tone is driven, shaped, and saturated by the plugin. I also used an instance of Clippie on the master BUS. In sum, the intent was just to “loudenize” and add a seasoning of characterful saturation.
In the above example, I deliberately increased the “In Gain” to about +5dB in unlinked mode. Secondly, I set the “Initial (Threshold)” to -1 dB, and the “End (Threshold)” pointed to -3dB. I kept the Clip Shape straight up at the 12:00 position; likewise with the “Harmonics” knob.
You hear subtle amounts of compression with pleasant, warm saturation occurring on the louder peaks. The output gain remains consistent and never exceeds -0.3 dB.
Enhanced Effect Control:
How do I set the Clipper’s Frequency Range?
It’s easy. Just click on the “EQ” button to access the frequency range controls. From there, you can assign them to the input signal, the output stage, or an optional sidechain source, giving you flexible control over exactly where ClipShifter does its work in the signal path.
Better explained, this refers to the specific range of frequencies that “Clippie” actually processes. This ‘step above’ feature is only available in the PAID version of ClipShifter, which is why paying the small purchase price is so worth it.

The frequency controls determine which parts of the signal are sent into the clipping algorithm, and which parts are allowed to pass through untouched.
As a result, the multi-band frequency controls let you choose how to process the low, mid and high portions of the audio spectrum independently.
NOTE: In the free version of ClipShifter, the plugin offers no such frequency selection; instead, it processes everything in the audio spectrum, with zero filtering.
Can ClipShifter Process in Mid/Side Mode?
You bet it can! You click the small “M/S” toggle button to gain access to ClipShifter’s evolved mid/side functionality.
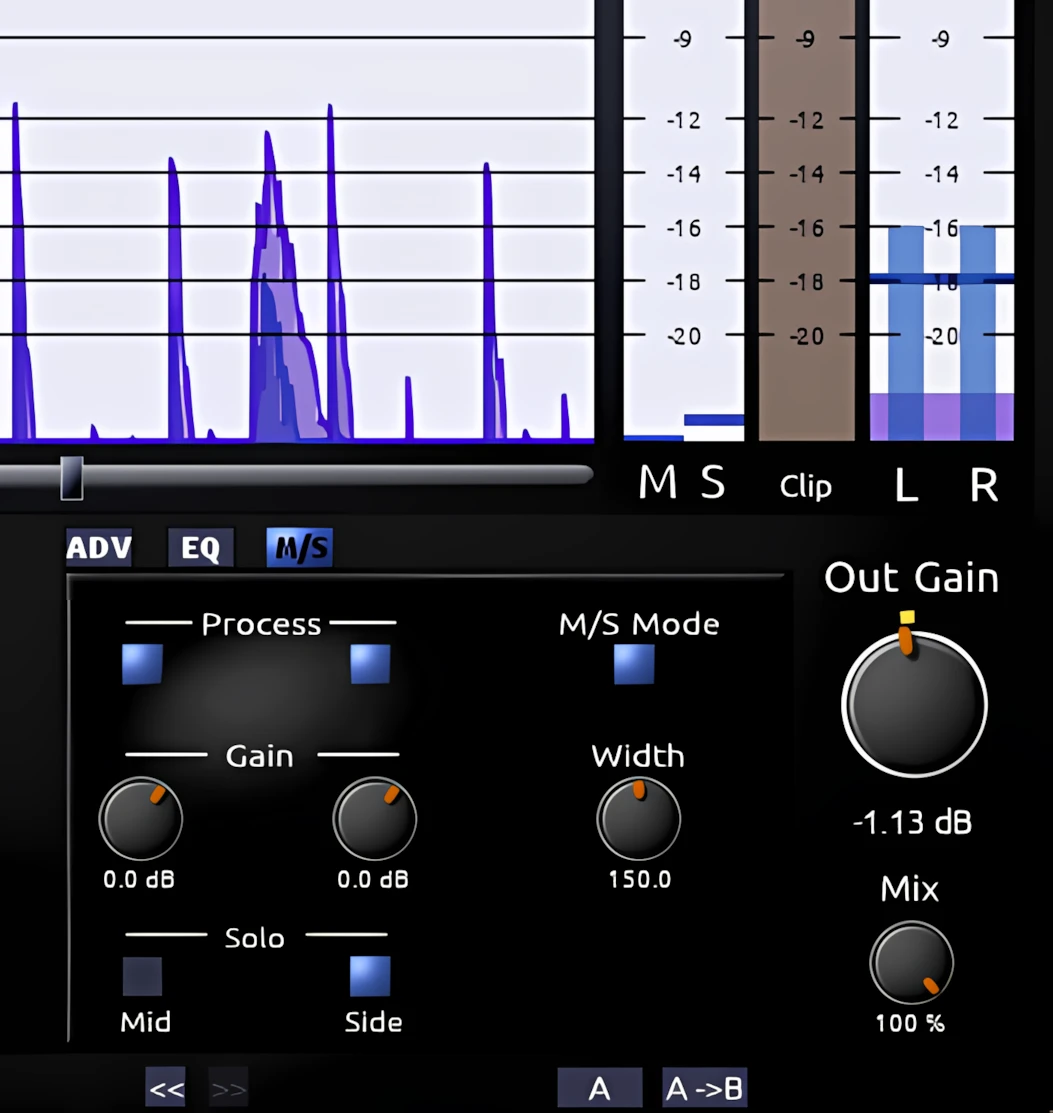
This is an especially useful feature that Mr. Witmer has conscientiously implemented into “Clippie”. The Mid/Side controls let you decide exactly which frequency ranges ClipShifter will process in each part of the stereo field.
For instance, you can choose to saturate only the high frequencies in the stereo “Side” spectrum, whist leaving the Mid intact and focused.
In conclusion, using ClipShifter in your chain with more subtle M/S settings can add a wonderfully ear-pleasing vibe, depth, and width to your mix without it ever sounding overdone.
Does ClipShifter 2 offer Oversampling?
It sure does! Up to 8x oversampling, in fact.
Keep an eye on the lower right corner of the video below – you’ll see me cycling through the oversampling values with my mouse.
CPU Consumption:
ClipShifter is incredibly light on both CPU and memory. I am genuinely impressed by this plug-in’s nimble speed and light-on-foot agility. I put it through its paces on a six-year-old AMD dual-core laptop and found that it still ran smoothly and efficiently, even under demanding settings. Moreover, I found that the CPU load remained comfortably manageable, even with 4x oversampling and doubling engaged.
Concluding Remarks:
ClipShifter is a ridiculously affordable, cross-platform goodie that will spice up any self-respecting home producer’s VST/AU library. “Clippie” is built on the Cockos WDL/IPlug framework, so it’s light, fast, and remarkably dependable in daily use.
The free version is a fun and inspiring introduction, but the extremely inexpensive full version steps it up as a true creative weapon in the modern home producer’s DAW, ready to handle serious work as confidently as it handles experimentation.
4.5 out of 5 Stars


:: Pros
- Affordable. No, inexpensive. No wait – ridiculously CHEAP!
- Wide range of “too-cool-for-school” saturation and clipping effects.
- Light on system resources.
- Excellent oversampling.
- Well-designed, intuitive 3D interface.
- Good selection of usable presets.
- Easy to navigate and smooth controls.
- Debut product from a new developer who CARES about his customers.
- Polite, professional product support.
- Exceptional reliability.
- No dongles, call/response challenges, nor invasive piracy protection overhead.
- Cross-platform MAC & PC & 64 bit..
::Cons
- Perhaps it’s not quite as silky as some long-established clippers, like IK Classic Clipper, but it remains a highly useful, creative effect with loads of potential. I’m confident that future releases of this plug-in will bring even greater refinement and an even higher level of sound quality.
Visit the LVC-Audio website. LVCaudio.com
Intellectual Copyright – 2013 – All rights Reserved. This review may not be copied or reproduced in whole, nor in part, without express written permission from the author.

Leave a Reply